Installation Guide for Wood Plastic Composite Decking Tiles
Welcome to your comprehensive guide on installing wood plastic composite (WPC) decking tiles. This article will walk you through every step of the process, from preparation to the final touches. Whether you’re a DIY enthusiast or a professional installer, this guide will help you avoid common mistakes and ensure your deck looks great and lasts long.
Preparation: Laying the Foundation for Your Deck
The first step in any successful installation is preparation. Begin by selecting a flat, level area for your deck. If your chosen site isn’t perfectly level, use a level tool to identify high and low spots. You can correct minor unevenness using shims or sanding down high areas.
Tools and Materials Needed:
- Measuring tape
- Level
- Shims
- Sandpaper or sander
- Decking tiles
- Fasteners (screws, clips)
- Drill
- Hammer
- Circular saw (if cutting tiles)
Laying the Tiles: A Step-by-Step Process
Once your surface is ready, it’s time to lay the WPC decking tiles. Start by marking out the perimeter of your deck with chalk or string. This will serve as a guide as you lay out the tiles.
Step 1: Layout and Planning
Lay out the tiles without fastening them to ensure they fit correctly. Adjust the layout if necessary to achieve an aesthetically pleasing pattern. Common patterns include straight, diagonal, and herringbone. Each pattern has its unique charm and requires different spacing considerations.
Step 2: Installation
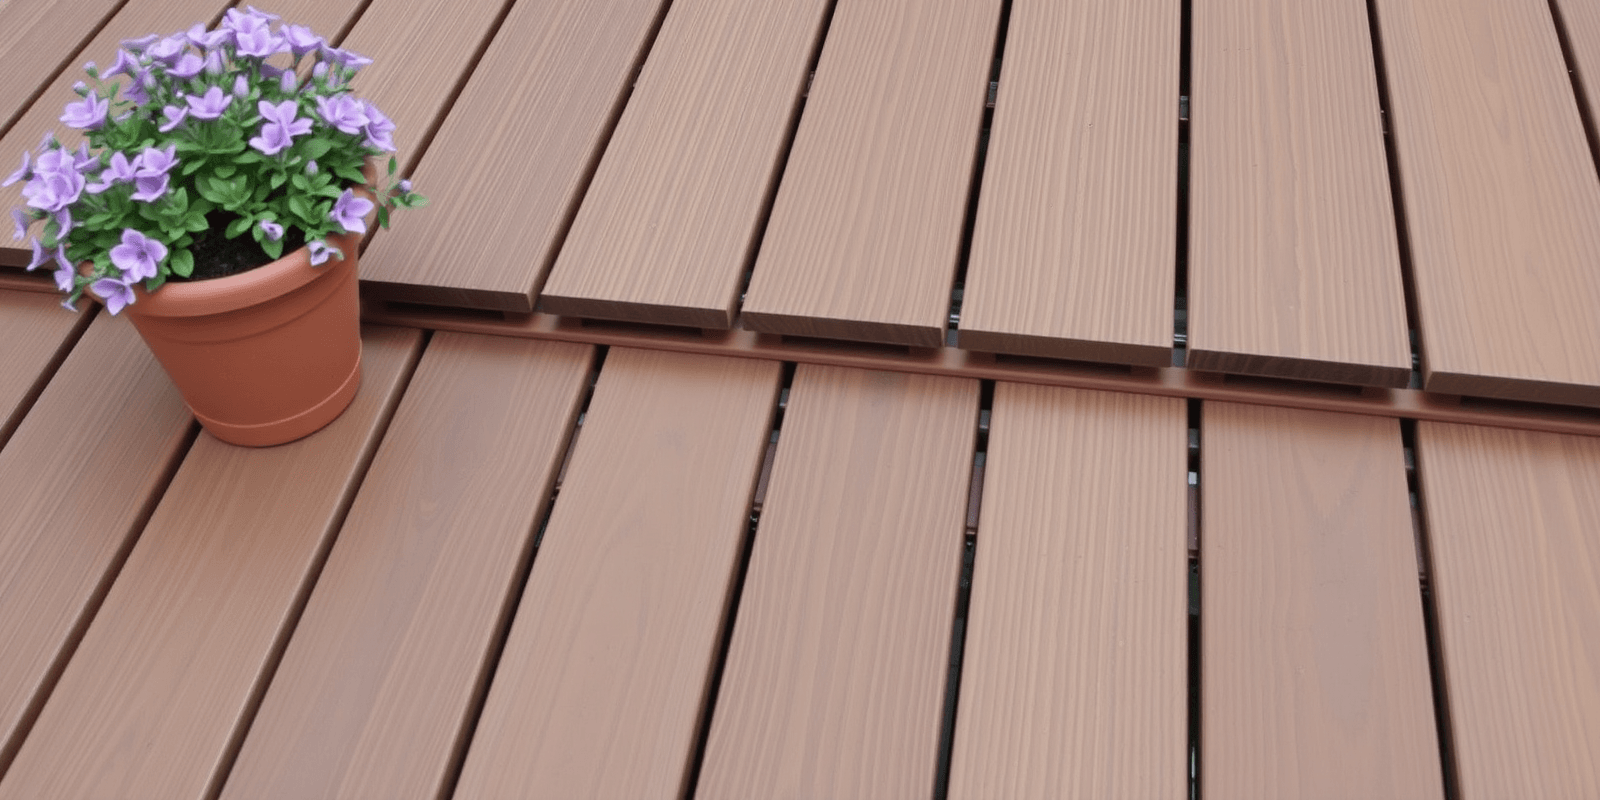
Begin installing the tiles at one end of the deck. Use clips or screws to secure each tile in place. For a seamless look, stagger the joints between rows to minimize visibility. Ensure that each tile is level and aligned with the others.
Securing Properly: Ensuring Longevity
Proper securing is crucial to prevent your deck from becoming loose over time. Use appropriate fasteners designed for WPC materials. Screws should be driven into the side of the tiles rather than the top surface to maintain the integrity of the material. Clips should be used according to the manufacturer’s specifications to ensure even distribution of weight and pressure.
Finishing Touches: Enhancing Your Deck
After all the tiles are laid and secured, it’s time to add the finishing touches. Clean up any debris left during the installation process. Consider adding trim around the edges for a polished look. Additionally, applying a sealant can protect your deck from moisture and UV damage, enhancing its longevity.
Avoiding Common Mistakes and Troubleshooting Tips
One common mistake is not allowing enough space for expansion. WPC materials expand and contract with temperature changes. Leave a small gap between tiles and against structures to accommodate this movement.
If you encounter issues such as warping or squeaking, recheck the leveling and spacing. Sometimes, adjusting the placement or tightening fasteners can resolve these problems.
Conclusion: Embrace Your New Deck
With careful planning and execution, your WPC deck will become a beautiful addition to your home. Remember, the key to a successful installation lies in proper preparation, careful laying, secure fastening, and thoughtful finishing touches. By following these steps, you’ll create a deck that not only enhances your outdoor living space but also stands the test of time.
Reference:
Deck Project,
Family Handyman

